Using Vue with MassiveRealm
Vue is a popular JavaScript framework for building user interfaces and single-page applications.
You can use MassiveRealm with Vue to create real-time applications such as chat apps, collaborative tools, and multiplayer games.
Getting started
Check out our Quick Start Guide to create a new MassiveRealm project and get your API key.
Prerequisites:
- Create a new MassiveRealm project.
- Your project's URL and Public Key will be sent to your email.
- Create Logic entry.
- Create Room entry with alias
chat-room.
MassiveRealm Server Setup
Step 1: Create Model
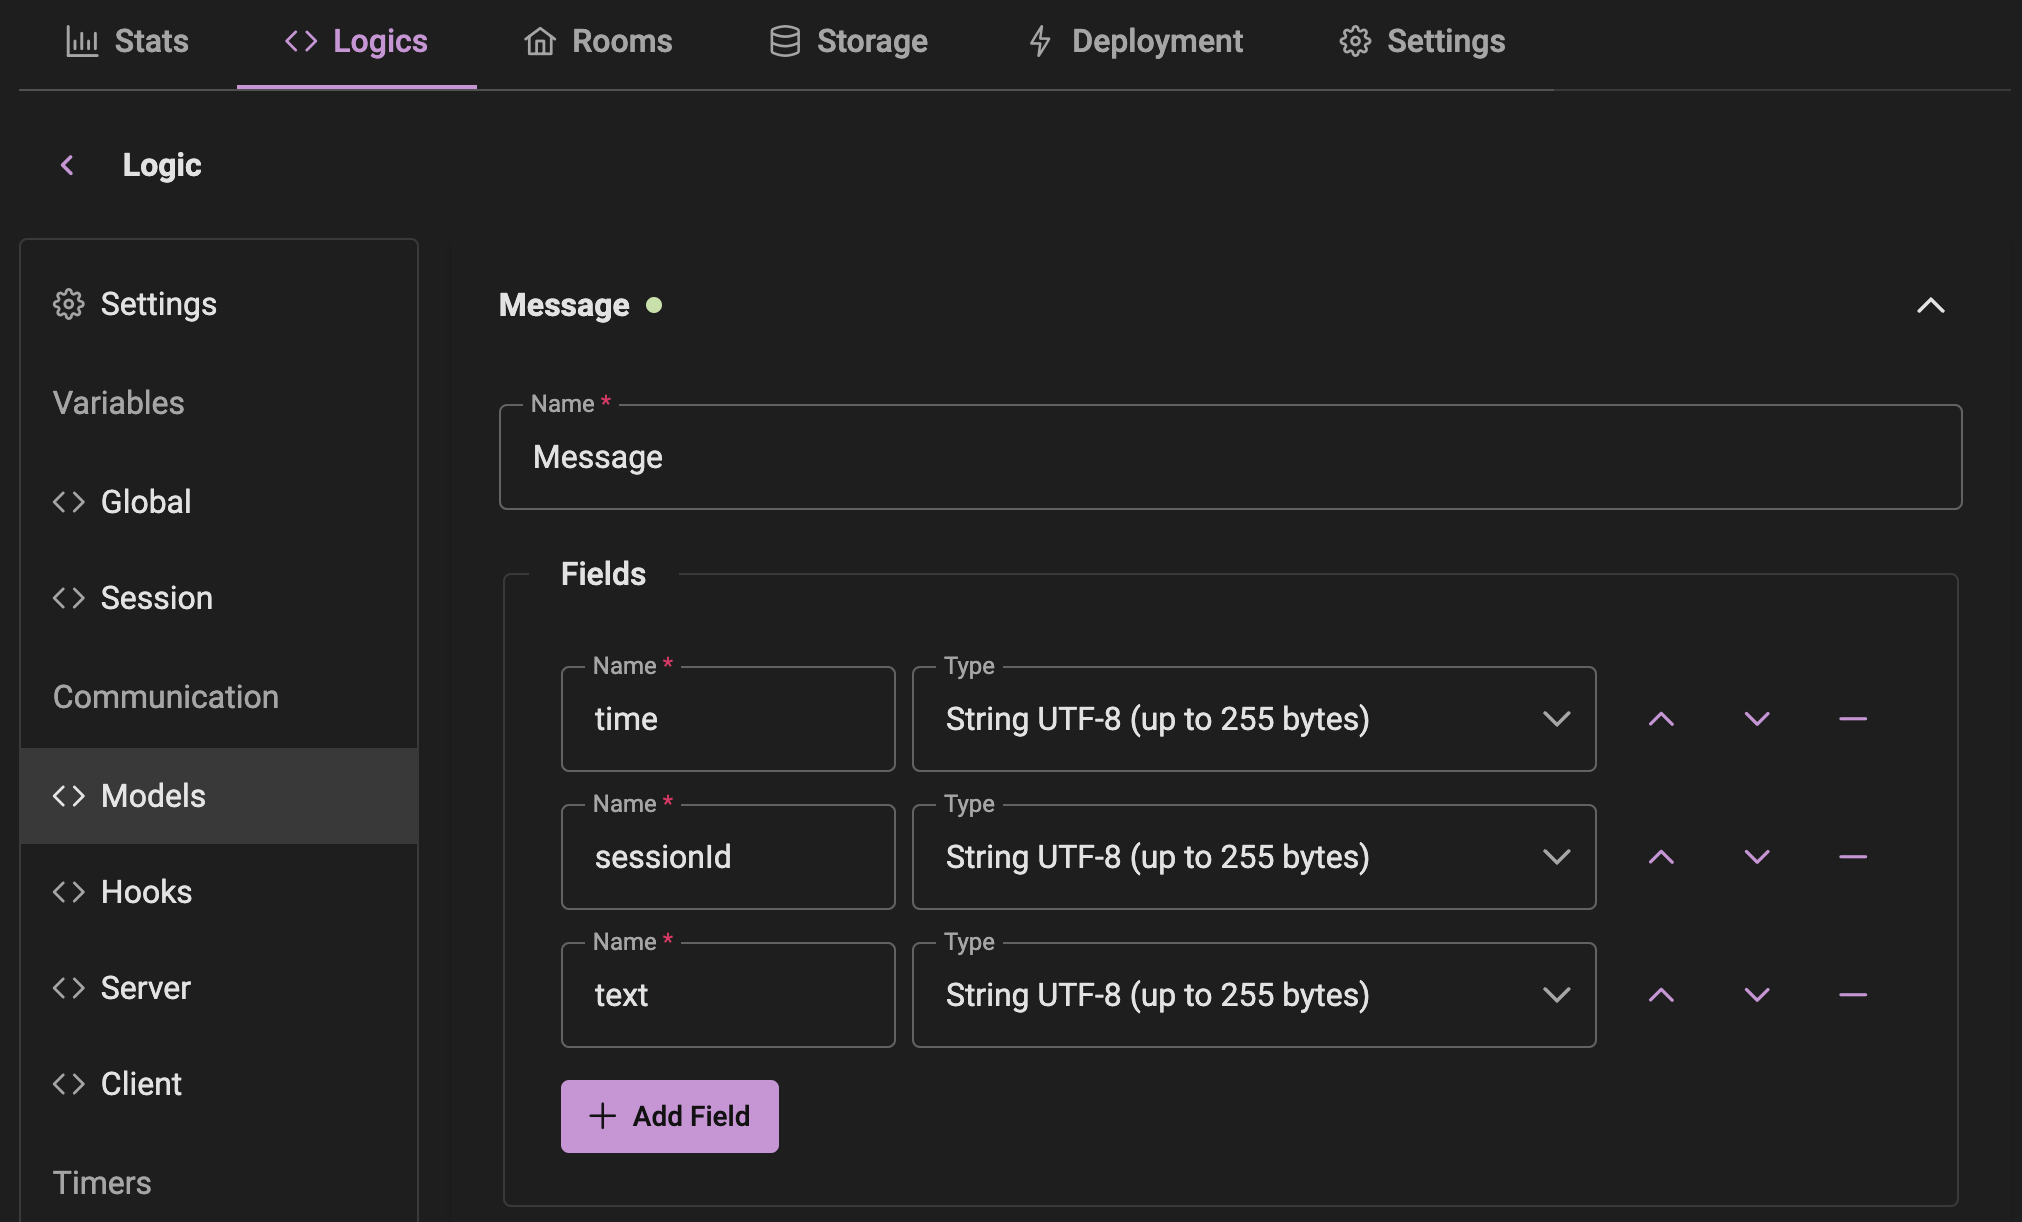
Navigate to the Communication > Models section in your project's logic and create a new model called Message with the following fields:
time - StringsessionId - Stringtext - String
Step 2: Create Server Command
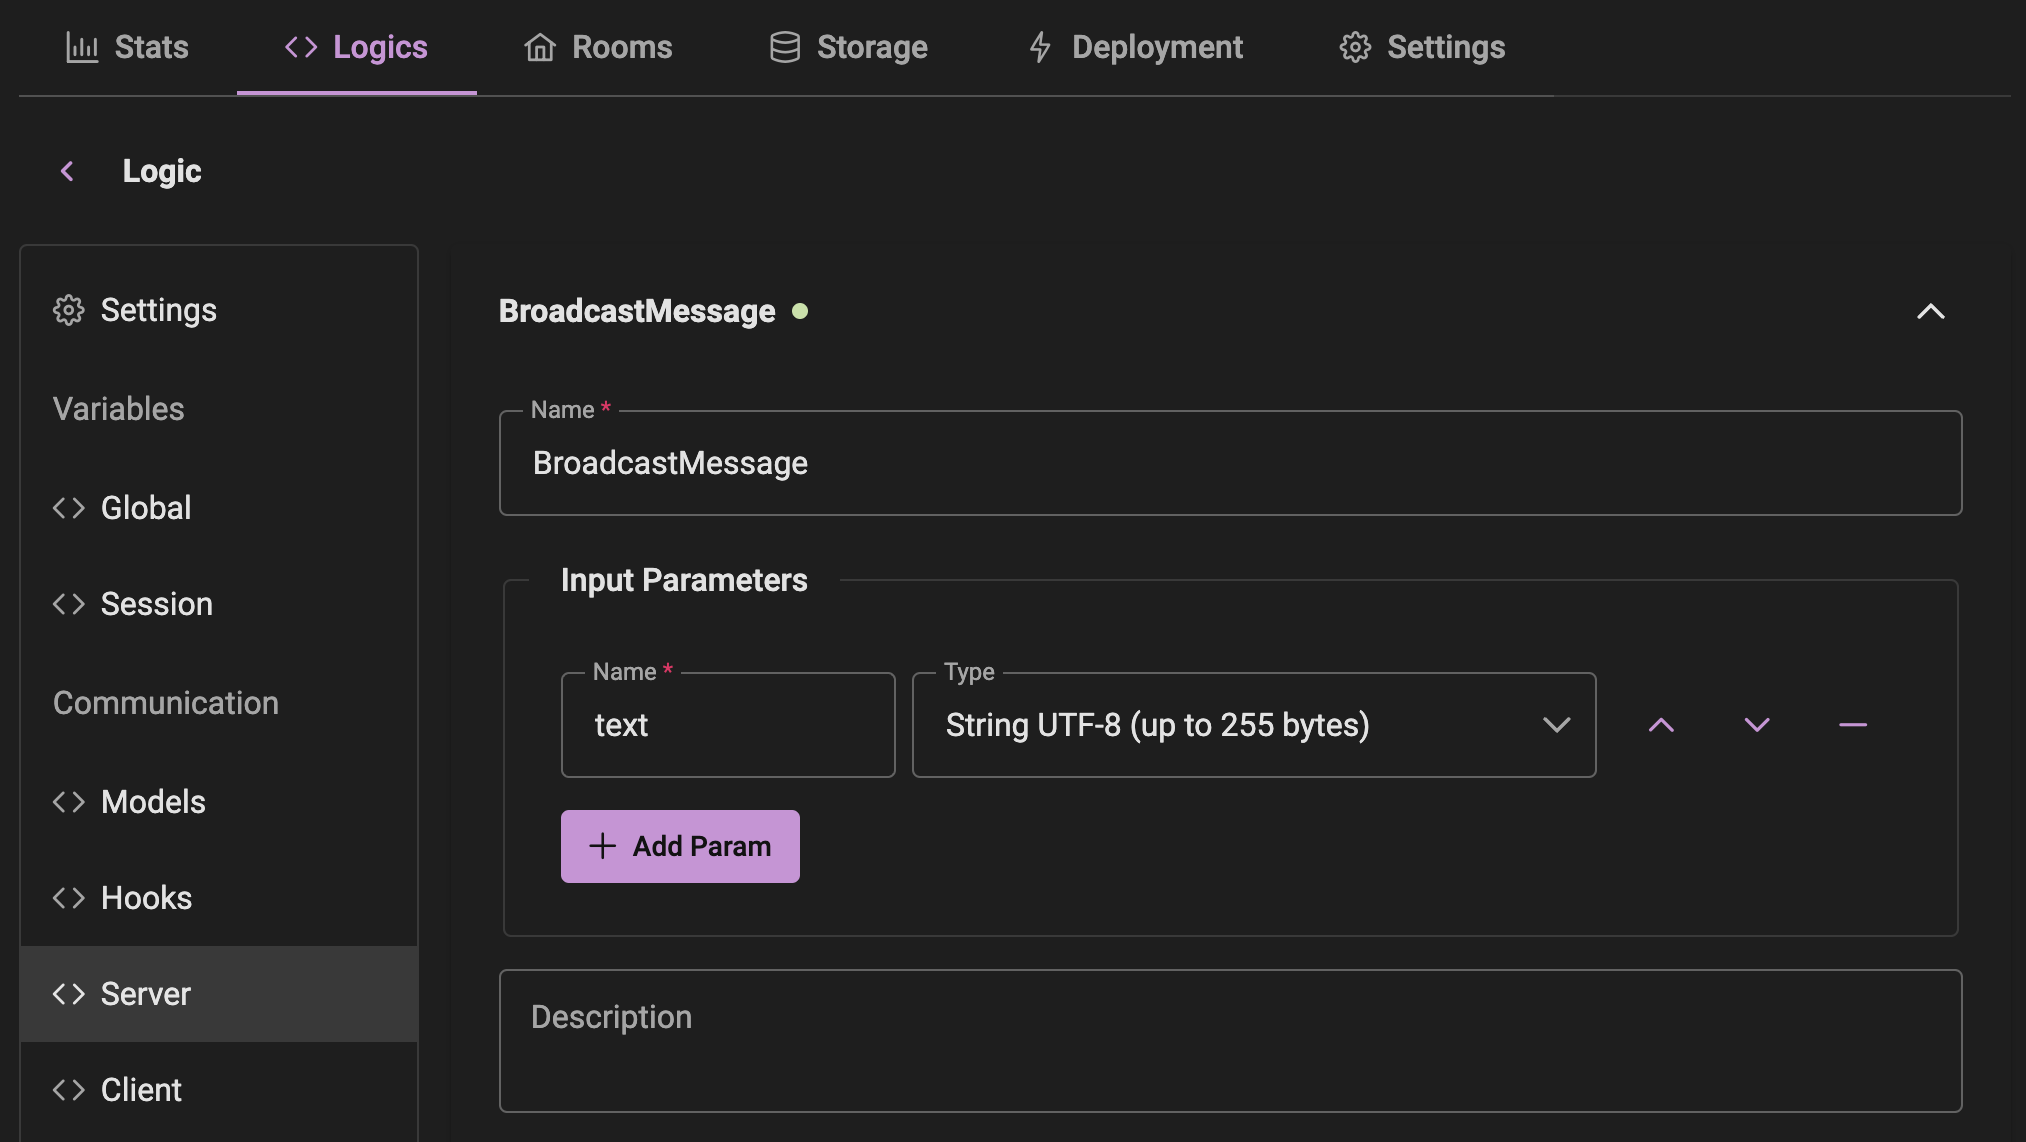
Navigate to the Communication > Server section in your project's logic.
Create a new command called BroadcastMessage with the following input parameters:
text - String
This command will broadcast a message to all clients in the room, except the sender.
Add the following code to the command:
let message = {
    time: (new Date()).toLocaleTimeString(),
    sessionId: $session.id,
    text: $params.text
};

$session.broadcast('NewMessage', { message });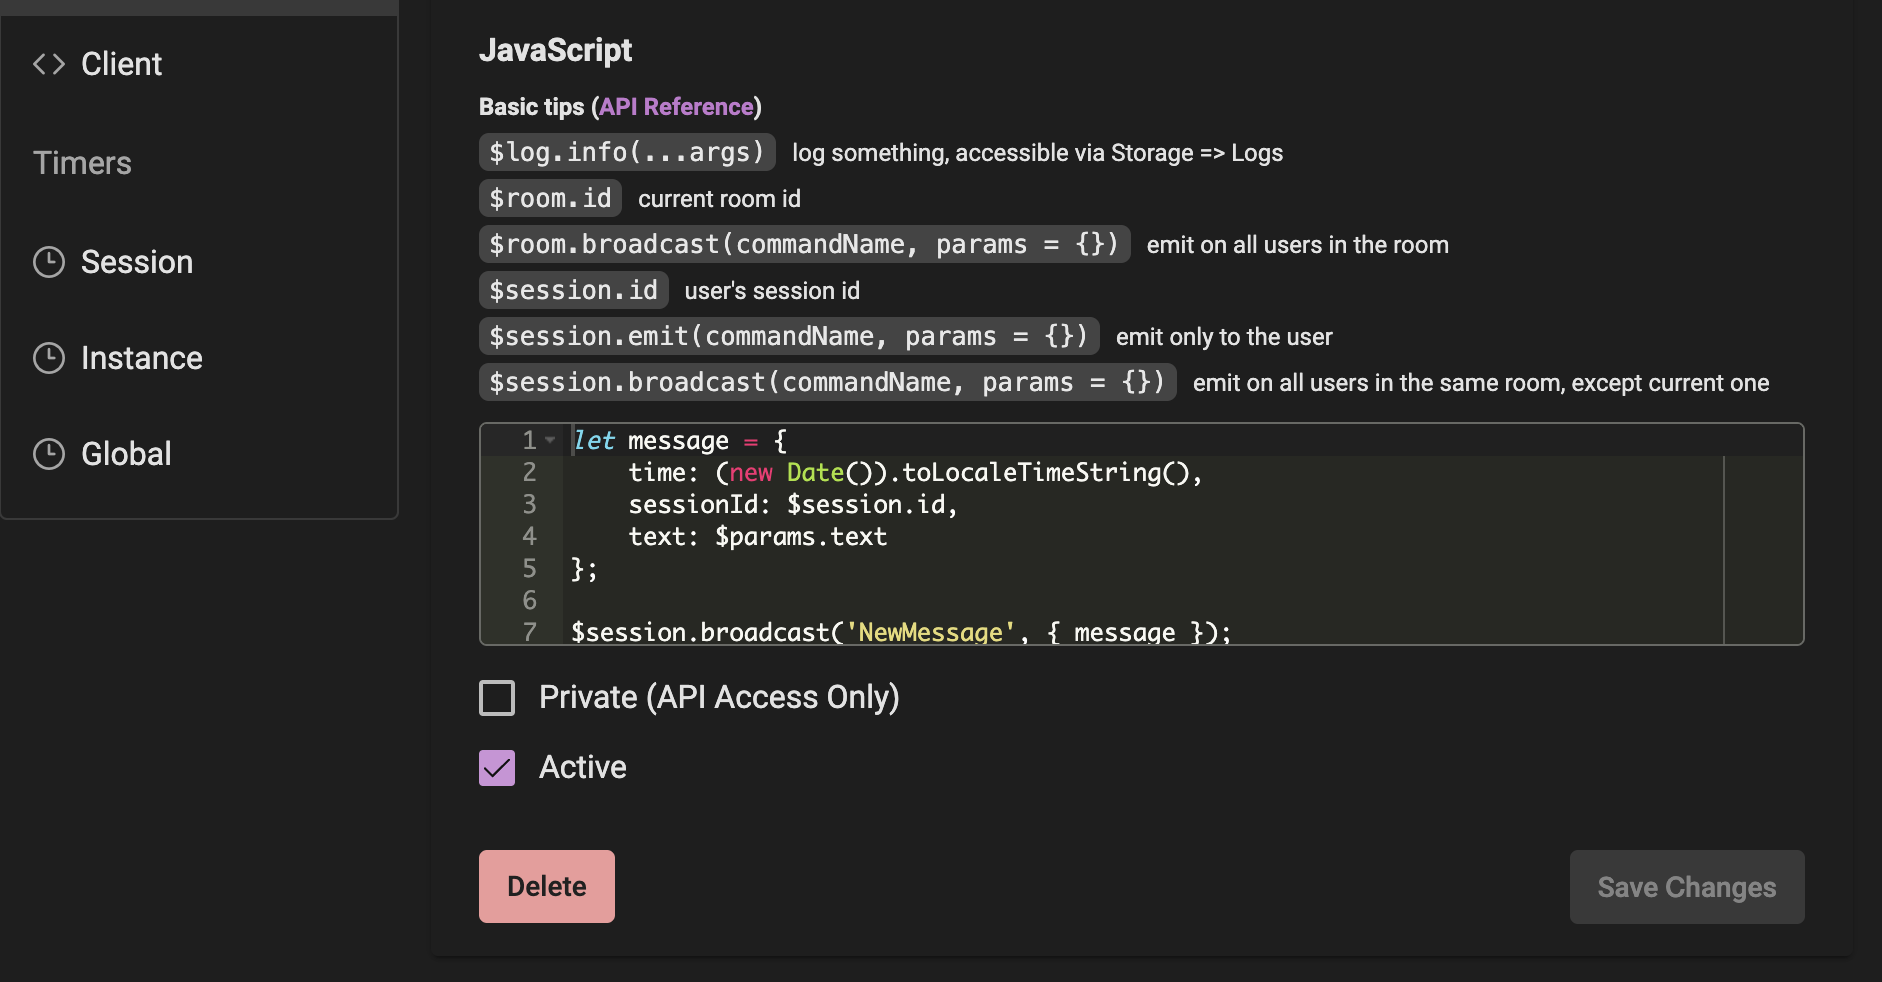
Step 3: Create Client Commands
Navigate to the Communication > Client section in your project's logic. Here we will create 3 commands:
Command 1: NewMessage
Input Parameters:
message - Type: "Model: Message"
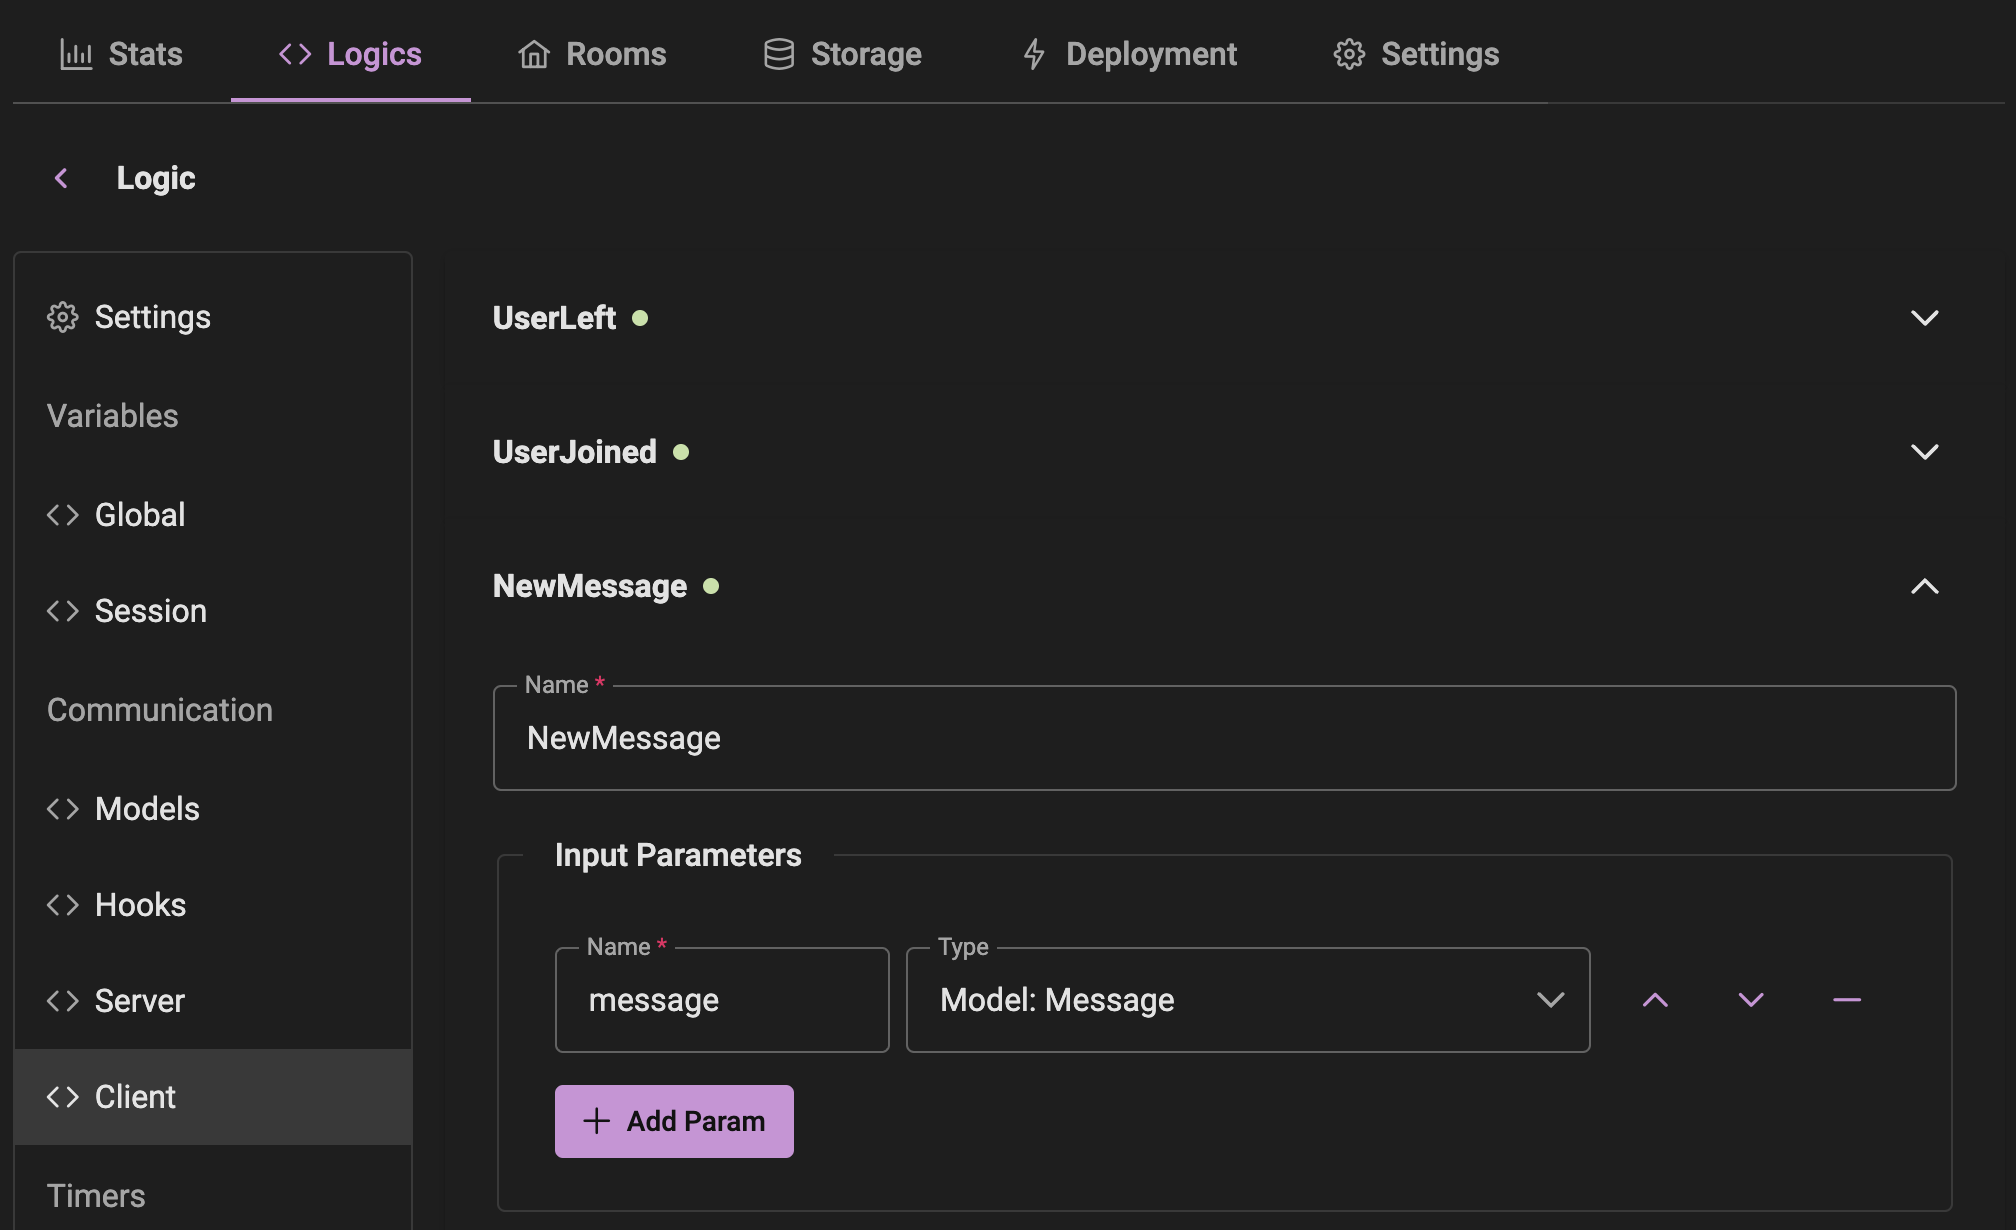
Command 2: UserJoined
Input Parameters:
sessionId - String

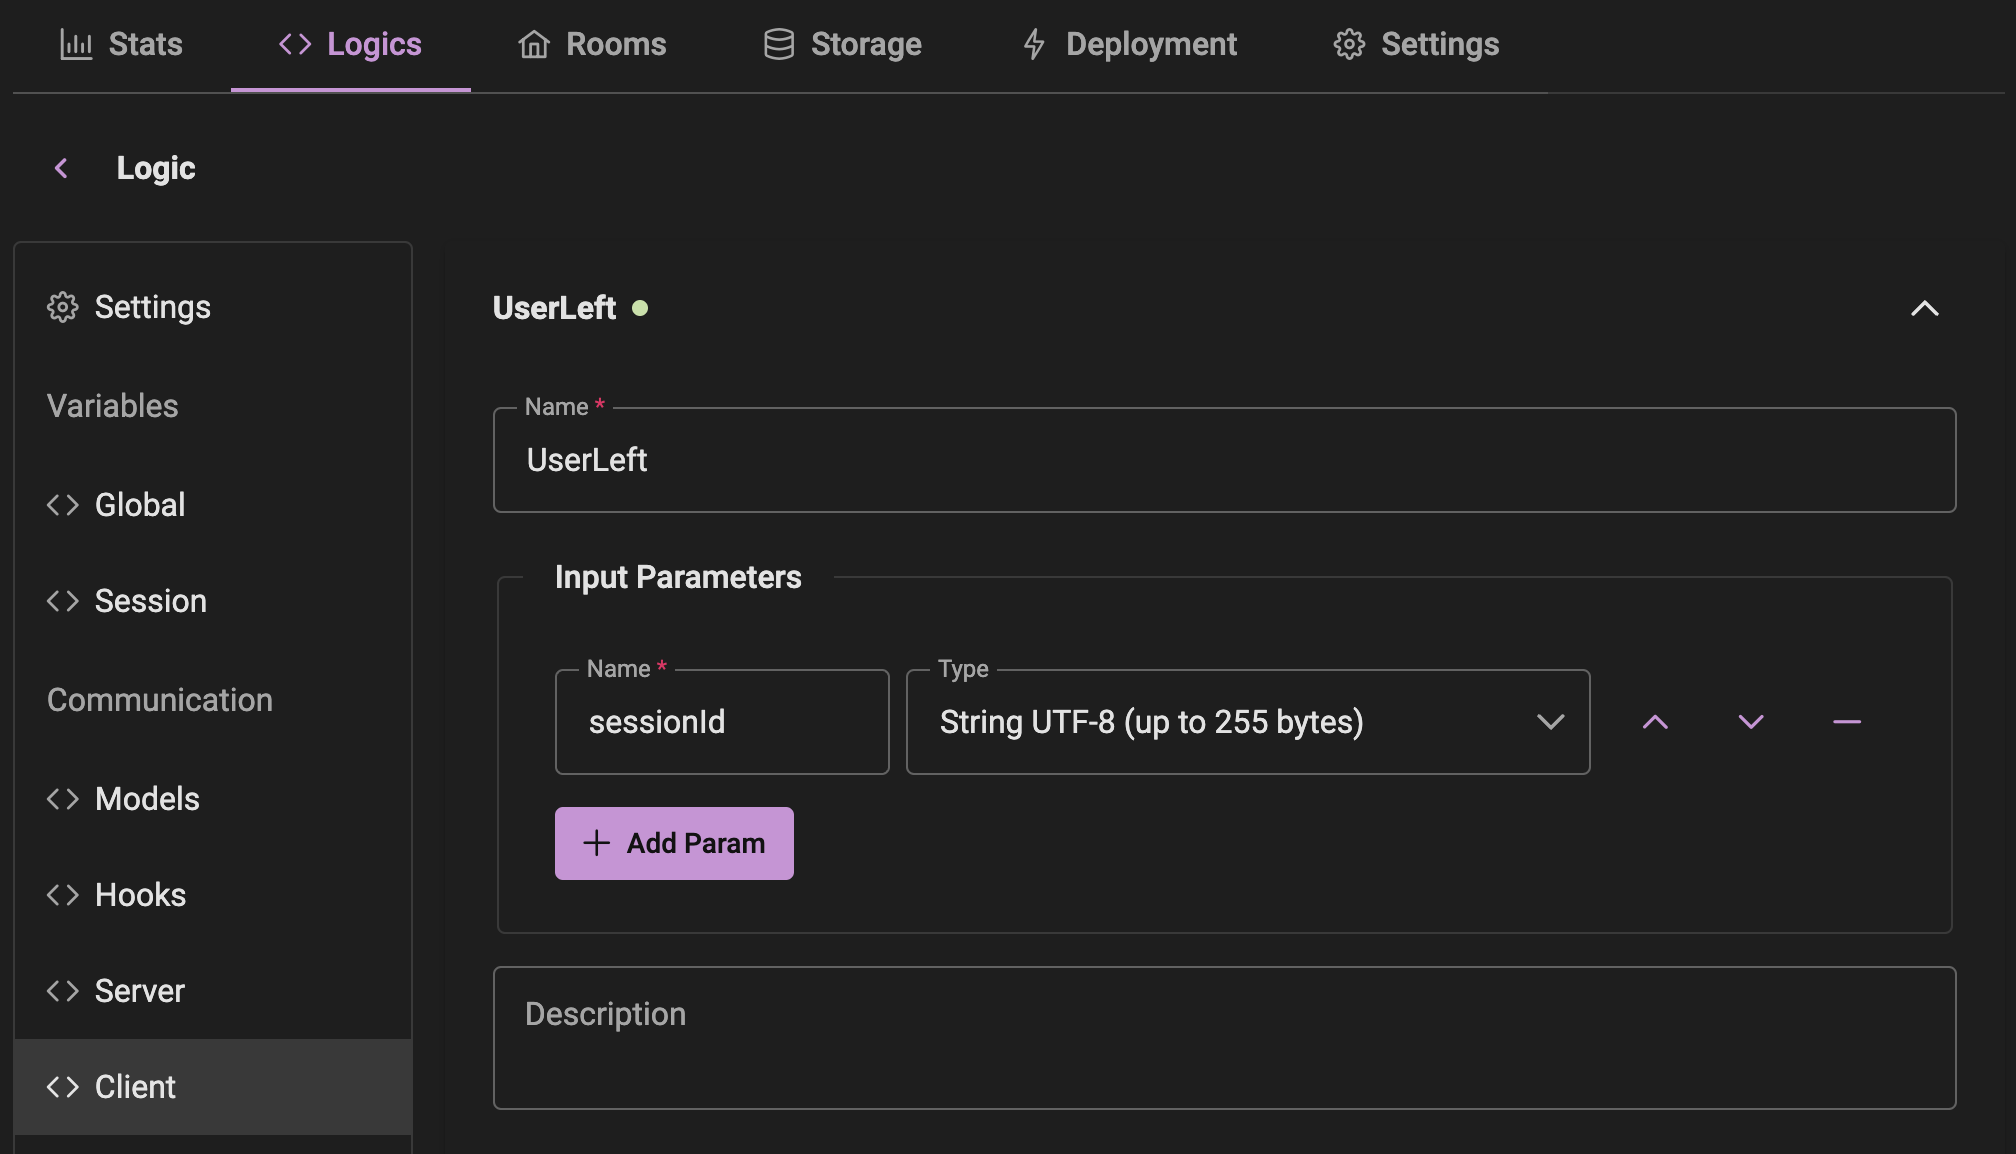
Command 3: UserLeft
Input Parameters:
sessionId - String
Step 4: Hooks
Navigate to the Communication > Hooks section in your project's logic.
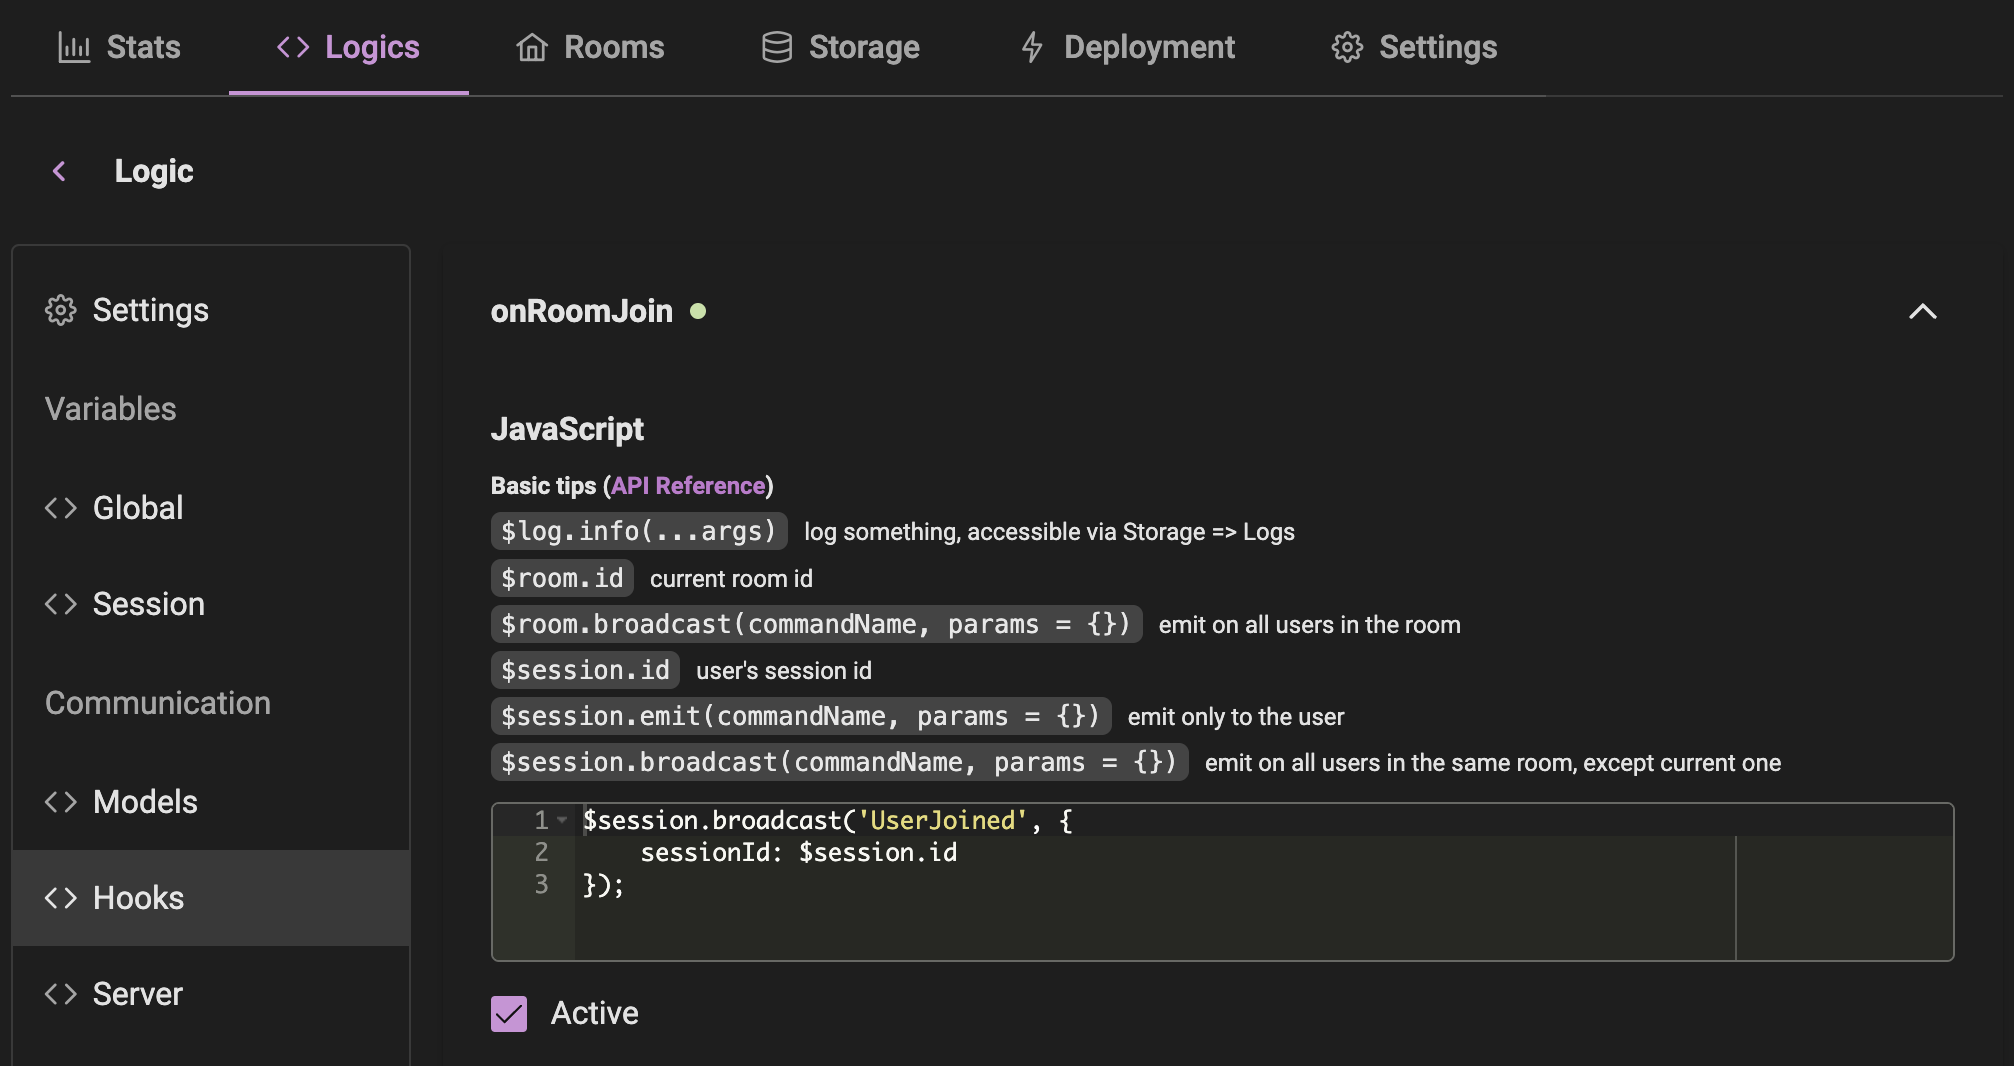
Hook 1: OnRoomJoin
Broadcast a message to all clients when a client joins the room.
$session.broadcast('UserJoined', {
    sessionId: $session.id
});
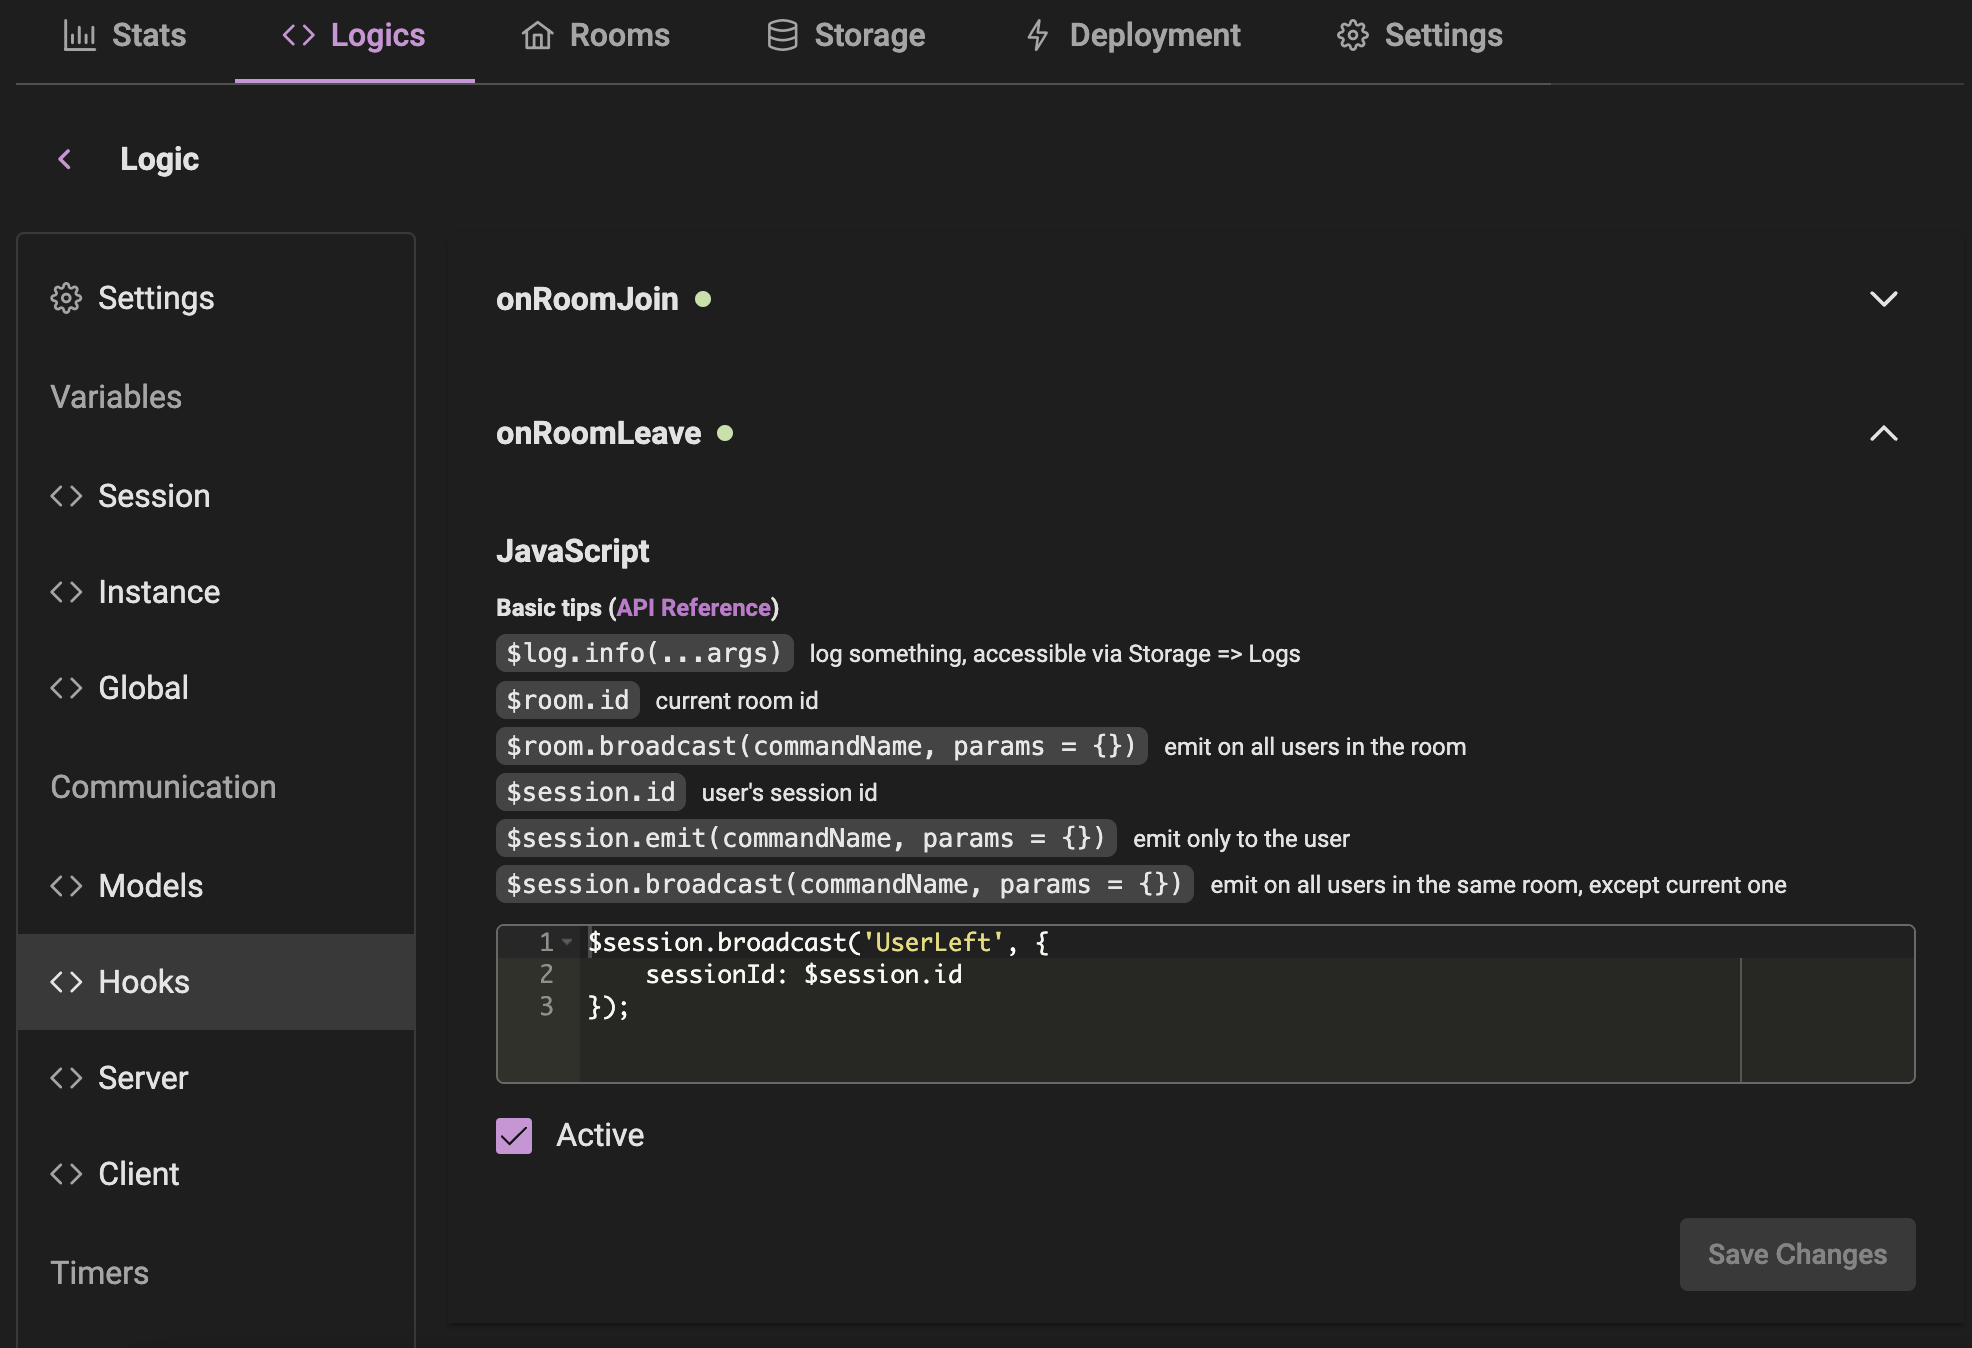
Hook 2: OnRoomLeave
Broadcast a message to all clients when a client leaves the room.
$session.broadcast('UserLeft', {
    sessionId: $session.id
});
Set Up Your Vue Project
Step 1: Create a Vue App
Create a Vue App:
bashnpm init vue@latest cd <project-name> npm installInstall MassiveRealm Client SDK:
bashnpm install massiverealm-client
Step 2: Create the UI
- Update
App.vue:vue<template> <div class="app"> <button @click="connect" :disabled="connected">Connect</button> <button @click="disconnect" :disabled="!connected">Disconnect</button> <input type="text" v-model="roomId" :disabled="!connected" /> <button @click="joinRoom" :disabled="!connected || joined">Join Room</button> <div v-if="joined"> <input type="text" v-model="message" /> <button @click="sendMessage">Send Message</button> </div> <div id="logs"> <div v-for="(log, index) in logs" :key="index">{{ log }}</div> </div> </div> </template> <script> import { ref } from 'vue'; import { Client as MassiveRealmClient } from 'massiverealm-client'; export default { setup() { const mrClient = ref(null); const connected = ref(false); const joined = ref(false); const logs = ref([]); const roomId = ref('room-1'); const message = ref(''); const appendLog = (message) => { logs.value.push(message); }; const connect = () => { mrClient.value = new MassiveRealmClient({ debug: true, url: 'https://your-project-url/', // Replace with your project URL publicKey: 'your-public-key', // Replace with your public key onConnect: () => { appendLog('Connected'); connected.value = true; }, onDisconnect: () => { appendLog('Disconnected'); connected.value = false; joined.value = false; }, onJoinRoom: () => { appendLog(`Joined room ${roomId.value}`); joined.value = true; }, onLeaveRoom: () => { appendLog(`Left room ${roomId.value}`); joined.value = false; }, onCommand: (command, data) => { appendLog(`Received command: ${command} with data: ${JSON.stringify(data)}`); }, onError: (error) => { appendLog(`Error: ${error}`); }, }); mrClient.value.connect(); }; const disconnect = () => { if (mrClient.value) { mrClient.value.disconnect(); mrClient.value = null; } }; const joinRoom = () => { if (mrClient.value) { mrClient.value.joinRoom({ alias: 'chat-room', id: roomId.value }); } }; const sendMessage = () => { if (mrClient.value) { mrClient.value.emit('BroadcastMessage', { text: message.value }); message.value = ''; } }; return { connected, joined, logs, roomId, message, connect, disconnect, joinRoom, sendMessage, }; }, }; </script> <style> .app { text-align: center; } #logs { margin-top: 20px; text-align: left; height: 200px; overflow-y: scroll; border: 1px solid #ccc; padding: 10px; } button { margin: 5px; } input { margin: 5px; } </style>
Step 3: Test the Application
Run Your Vue App:
bashnpm run devConnect and Interact:
- Click the
Connectbutton. - After connecting, enter a room ID or use the default
room-1, and clickJoin Room. - Observe the logs for connection, room joining, and disconnection events.
- Click the
By following these steps, you should have a basic chat application that connects to a MassiveRealm server, joins a room, and logs connection events.
Optimization Tip
Storing room settings on the client side may significantly reduce network traffic. This way, the client will not need to request the room settings each time it joins a room.
Navigate to the Rooms section and select the room you want to optimize. Then click on Export on the left side and copy the code.
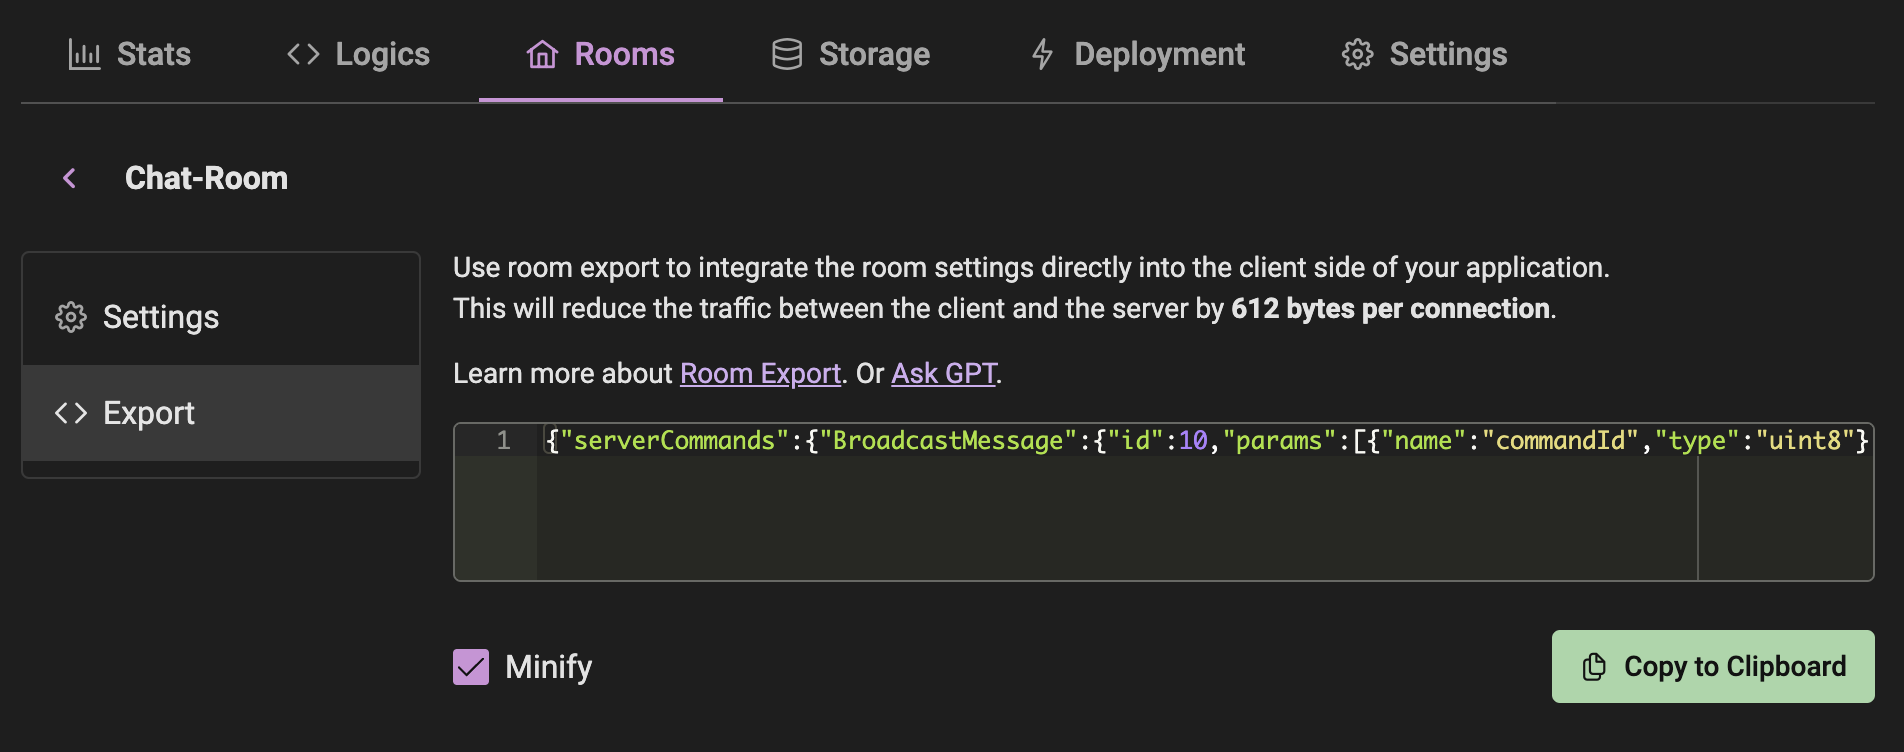
Paste that JSON into the client-side code, and you're done!
 ...
 const connect = () => {
   mrClient.value = new MassiveRealmClient({
     debug: true,

     // Replace with your project URL
     url: 'https://your-project-url/',

     // Replace with your public key
     publicKey: 'your-public-key',

     roomConfig: {
       'chat-room': {"serverCommands":{"BroadcastMessage":{"id":10,"params":[{"name":"commandId","type":"uint8"},{"name":"text","type":"string8"}]}},"clientCommands":{"UserLeft":{"id":10,"params":[{"name":"commandId","type":"uint8"},{"name":"sessionId","type":"string8"}]},"UserJoined":{"id":11,"params":[{"name":"commandId","type":"uint8"},{"name":"sessionId","type":"string8"}]},"NewMessage":{"id":12,"params":[{"name":"commandId","type":"uint8"},{"name":"message","type":"model:Message"}]}},"models":{"Message":{"params":[{"name":"time","type":"string8"},{"name":"sessionId","type":"string8"},{"name":"text","type":"string8"}]}}}
     },

     onConnect: () => {
       appendLog('Connected');
       connected.value = true;
     },

     ...
   });

   mrClient.value.connect();
 };
More Performance Tips.